How Can We Help?
Compatibility FAQs
The Xebec Tri-Screen works works with Mac, Windows, Linux, Chromebook and any device with a video-out source.
Each screen will require video and power, though the specific setup may vary by laptop. If you want to check whether you need a Tri-Screen Adapter, take our quiz here!
The Tri-Screen comes with a variety of cables, but not all will be necessary for every set-up. Here is what is included in the box, and the function of each piece:
USB-C to USB-C cable (x2):

This cable is capable of providing both video and power to one screen depending on your laptop.*
*Note: Not all USB-C ports are capable of displaying video. Check your laptop's specifications for more information on your specific set-up.
USB-C Extension Cable (x1):

This cable connects to one of the USB-C to USB-C cables in order to allow the cable to reach from one side of your laptop to the opposite screen.

HDMI to MiniHDMI Cable (x2):

These are the longest cables you received. This cable is capable of providing a video signal only. In order to get power to the same screen, you will need to use an additional USB cable.
USB-C to USB-A Adapter (x2):

Use this piece to adapt the tip of a USB-C cable into a USB-A connection. When this is used, it will allow you to use a USB-A port on your laptop to transmit power to a screen.*
*Note: USB-A ports are unable to transmit a video signal.

90 Degree USB-C Elbow (x1):

If your laptop charges via USB-C and you are utilizing the passthrough charging feature of the Tri-Screen, this piece prevents strain on your laptop's charger by allowing it to connect at a 90 degree angle to the screen. While this piece is a great tool, you are still able to charge your laptop by plugging the charger directly into the screen as well.

Screens: 2 10.1in, 1920 x 1200, full HD LCD IPS panels
Aspect ratio: 16:10
Refresh rate: 60hz
Compatibility: All operating systems, including Mac, Windows, Linux, ChromeOS; fits laptops with screens ranging from 12-20in
Dimensions: 25.4mm x 190.5mm x 305mm
Weight: 2lb
Input: 2 x USB-C with DP inputs
Dongles for USB-A provided
Power consumption: 5V 2A per screen
While dual USB-C connections provide the easiest set up, not every laptop will have 2 video capable USB-C ports. If your laptop does not have 2 USB-C ports, it most likely does have at least one HDMI Port. This will be a simple setup as well!
Follow the instructions in this video to see how to connect a laptop with this configuration:
Please note, that there are a variety of different laptop models with different connection options. If the above video does not match up with your own set-up, check whether you need a Tri-Screen Adapter by taking our quiz here! Or, Contact Us and we are more than happy to walk you through your set-up options.
Yes! The Xebec Tri-Screen 2 is compatible with the MacBook Pro & MacBook Air laptops using the M1 and M2 Chip processors. However, setups will vary depending on the model.
To determine which chip your MacBook has, click the Apple icon > click 'About This Mac', and your chip/processor will be listed. See below for setup instructions based on your chip/processor.
Depending on your MacBook's processing chip, you may need to use the Tri-Screen Adapter
M1 & M2 Pro or M1 & M2 Max Chipsets (14" & 16" MacBook Pro's)
The 2021-2023 MacBook Pro's with the M1 & M2 Pro Chip and M1 & M2 Max Chip processors will work seamlessly with the Tri-Screen 2 using our easiest setup! Each screen will simply use a USB-C cable included with the Tri-Screen 2. Check out this quick tutorial video here!
M1 and M2 Chipsets
Our Tri-Screen Adapter is needed to allow both screens to function due to Apple’s M1 and M2 chip limitation preventing 2+ external monitors from being used natively.
Simply plug the Adapter into one screen, and plug the USB-C cable included with the Tri-Screen 2 into the other screen and you’ll be set! Check out this video here to see how the Adapter works, or review the complete written instructions below. A driver will need to be installed which can be found here!
Setup Instructions for the M1 and M2 Chipsets
Right Screen
- Using the provided USB-C to USB-C cable, plug one end into the USB-C port on your laptop and plug the other end into the Tri-Screen's USB-C port.
- You may use this screen for pass-through charging by plugging your charger directly into the screen's additional USB-C port!
Left Screen
- Grab the Tri-Screen Adapter and included USB-A to USB-C connector. Plug the USB-A to USB-C connector into the USB-A end of the Adapter, and then plug the USB-C end of the connector into your laptop.
- Plug the Adapter's USB-C end into the Tri-Screen’s USB-C port.
- Plug the Adapter's Mini-HDMI end into the Tri-Screen’s Mini-HDMI port.


If you require any assistance, please schedule a call with us directly on our calendar!
We are aware of the current native screen resolution limitations on the new M1 Max and M1 Pro MacBook Pro laptops that affect your ability to change to a lower 16:10 resolution such as 1280x800 and 1600x1000, thus limiting your resolution to 1920x1200 (aka - rather small text). We have been in close contact with Apple regarding this limitation and they are both aware of the issue and actively working on a patch in MacOS to resolve this issue.
In the meantime we found a 3rd party solution, SwitchResX, that allows you to adjust your screen resolution optionsInstall Instructions:
- Click here to download the most recent version of SwitchResX
- Install the application following the on screen instructions
- Restart your laptop
- Make sure you have both of your Xebec Tri-Screens connected to your MacBook Pro via the USB-C cables. Launch SwitchResX from your System Preferences window

5. Click "Install Helper Tools" and follow the on screen instruction

6. Click "Launch Daemon"

7. In the left hand menu click "RTK HDR (2)"
8. Within the "Display Information" tab select the checkbox next to "Scaled resolutions base:" and change the numbers to "1920" x "1200"

9. Select the "Custom Resolutions" tab and click the "+" button in the bottom left

10. In the Scale to input field, under the Horizontal column input "1280" and under Vertical input "800". Click "OK"

11. Click the "+" again and under the Horizontal column input "1600" and under Vertical input "1000". Click "OK"

12. In the SwitchResX Control Apple Menu bar select File -> Save settings. Or key in ⌘ S

13. Restart your MacBook Pro
14. Launch SwitchResX from your System Preferences window
15. In the left hand menu click "RTK HDR (2)" and click in the "Current Resolutions" tab. Under Resolution scroll to find and select 1280 x 800, 60 Hz. Notice how the resolution scales and the text on your screen appears "larger"

16. In the left hand menu click "RTK HDR (3)" and in the "Current Resolutions" tab, under Resolution scroll to find and select 1600 x 1000, 60 Hz
Congratulations! You have now installed 1280x800 and 1600x1000 resolutions as native options on your M1 Max or M1 Pro.
You can now access these resolutions within your Display Settings menu.
- Open your Display Settings (System Preferences --> Displays --> Display Settings)
- Select either of your Tri-Screens from the left hand menu (RTK HRD (1) or RTK HRD (2))
- Under the Color Profile dropdown select SwitchResX4 - RTK HDR
- Select "Scaled" under Resolution
- Now you should see your two new resolutions that you can select: 1280 x 800 and 1600 x 1000

The Tri-Screen is compatible with the Microsoft Surface Pro (versions 3, 4, 5, 6, 7, 8, 9, X). However, adjustments will be needed:
- Versions 3-4 require a Microsoft Surface Dock and 2 x Mini DisplayPort to HDMI adapters to function properly.
- Versions 5-9 can take advantage of the Microsoft Surface Dock 2 which allows for just one cable per screen (provided with the Tri-Screen).
- Version X will also need the Microsoft Surface Dock 2 in order for the Tri-Screen to fit properly
Please note that the Tri-Screen does cover up the Surface's built-in kickstand, requiring use of the fixed angle kickstand that comes with the Tri-Screen. The angle of the Tri-Screen kickstand may need to be adjusted to ensure a centered weight.
All in all, while the Tri-Screen is compatible with the Surface Pro, we find it is best enjoyed on a traditional style laptop vs. tablets.
Surface Book & Surface Laptop Compatibility:
The Tri-Screen is compatible with all versions of Microsoft Surface Book. However, adjustments will be needed:
- Surface Book 1: This model has 2x USB-A and 1 mini-DP. You will need to use 2 of our Tri-Screen Adapters for this set-up. One adapter per screen connection!
- Surface Book 2, 3 & 4: These models simply require a Tri-Screen Adapter to provide video to one of the screens. The rest of the connections work with the model's native ports.
- Surface Laptop 1 & 2: These models of Surface Laptop will require the use of the Microsoft Surface Dock 2 with a dual USB-C connection or 2x Tri-Screen Adapter + a powered USB-A Hub, with one adapter per screen connection!
- Surface Laptop 3, 4 & 5: These models simply require a Tri-Screen Adapter to provide video to one of the screens. The rest of the connections work with the model's native ports.
If you have any other questions once you have your Tri-Screen 2, feel free to schedule a call with a Tech-Support Specialist and we can help get you all set up!
Yes! As long as your laptop screen is at least 11.8 inches wide (outside edge to outside edge) then it is compatible!
Please check our question "Will my laptop work with the Tri-Screen" above for more info.
To configure your Chromebook for multiple displays, follow these steps:
1. Open "Displays Settings" (Settings > Device > Displays)
2. Ensure that "Mirror Displays" box is unchecked
3. Click each monitor icon and note on which of your screens a red frame appears
4. Click and drag the screen icons so that they are on the same side as the associated screens with a red frame
5. To increase the zoom, adjust the "Display Size" slider, and select "1280 x 800" from the "Resolution" dropdown menu, or preferred zoom.


The Tri-Screen 2
SNAPDISPLAY APP
We've created an app to help you arrange your screens and even zoom in and out more easily! If you're interested in beta testing (currently for Mac only), visit our SnapDisplay App page for details!
FOR MANUAL ARRANGEMENTS
If you are unable to move your mouse from one screen to the other, it is most likely a simple fix within your display settings. Follow the instructions below to get set-up!
MacOS Monterey (12.0 +):
If you are using an earlier version of MacOS, follow the instructions in the video at the bottom of this article.
1. Click on the Apple Icon in the top left corner of your desktop.
2. Open System Preferences.
3. Select Displays.

4. Click and Drag to rearrange each display according to their physical layout on the desktop. As you drag a display, a red border will appear on the physical screen it corresponds with. *Confirm all monitors align at the top perfectly. Otherwise, you may have problems moving the mouse between displays from the corners.

MacOS Big Sur (11.6.7) and earlier:
If you are unable to move your mouse from one screen to the other, it is most likely a simple fix within your display settings. Follow the instructions below to get set-up!
Windows 11:
If you are using Windows 10, follow the instructions in the video at the bottom of this article.
1. Click on your Start Menu.
2. Open Settings.
 3. Click on System.


Windows 10:
If you are still having trouble, please schedule a support call with one of our Tech-Support Specialists and we will get you up and running!
You can find the DisplayLink divers for the Tri-Screen Adapter on our Drivers Page.
For detailed setup instructions, check out How Do I Use the Tri-Screen Adapter?
If your screens are duplicated / mirroring each other, you can adjust this quickly in your Display Settings! Follow the step-by-step instructions below to get everything set up.
Windows 11:
If you are using Windows 10, follow the instructions at the bottom of this article.
1. Click on your Start Menu.
2. Open Settings.

3. Click on System.
4. Click on Display on the right side.

5. Click on the option with the 1|2 or 1|3 to select it and then set it to Extend... from the drop down menu on the bottom r right, as pictured.

6. If you have any trouble moving your mouse to the left and right screens, view this article to arrange your screens correctly.
Windows 10:
Video instructions are also included below.
1. Click on your Start Menu.
2. Select Settings.

3. Select System.

4. Select Display.

5. Click on the rectangle with the '1 | 2' (or in some cases '1 | 3’ or '2 | 3') highlighting it blue.
6. Scroll down to the section titled Multiple displays
a. Click the drop-down menu.
b. Select Extend...

7. Make sure to select "Keep Changes" when that pops up. Please note, that message may appear on one of your additional screens, but still make sure to select "Keep Changes".
If you are still having trouble, please schedule a support call with one of our Tech-Support Specialists and we will get you up and running!
If you're screens are duplicated / mirroring each other, you can adjust this quickly in your Display Settings! Follow the step-by-step instructions below to get everything set up.
MacOS Monterey (12.0 +):
If you are using an earlier version of MacOS, follow the instructions in the video at the bottom of this article.
1. Click on the Apple Icon in the top left corner of your desktop.
2. Open System Preferences.
3. Select Displays.
4. Select Display Settings at the bottom of the window.

5. On the menu on the left side of the window, select the 2nd and 3rd options and ensure they are set to Use as: Extended display

MacOS Big Sur (11.6.7) and earlier:
If you are still having trouble, please schedule a support call with one of our Tech-Support Specialists and we will get you up and running!
If you are unable to move your mouse from one screen to the other, it is most likely a simple fix within your display settings.
Please refer to our display arrangement article here (including information on our SnapDisplay App) - How To Arrange Your Screens (Mac)
If you need further assistance, feel free to schedule a virtual call with our Tech Support team here - Troubleshooting Call
If you are unable to move your mouse from one screen to the other, it is most likely a simple fix within your display settings.
Please refer to our display arrangement article here - How To Arrange Your Screens (Windows)
If you need further assistance, feel free to schedule a virtual call with our Tech Support team here - Troubleshooting Call
You can adjust these settings to meet your personal preference by using the Menu button on the top of each screen. This is the button with 3 lines stacked on top of each other. After clicking the Menu button, you can scroll up and down by clicking the ‘+’ and ‘-’ buttons, and then clicking the Menu button to make your selection.
To reach the Color Temperature menu, press the buttons in the following sequence:
Menu > ‘+’ > Menu > Menu > ‘+’
You may cycle through the different options with the ‘+’ button to find your preferred setting. Once you’ve located your desired color temperature, simply press the Menu button one more time and allow a moment for the on-screen display to disappear.
Basic brightness adjustments can be made via the '+' and '-' buttons located at the top of each screen. The screens are independent of each other, so the brightness of each screen can be adjusted separately based on your personal preference.
Each of the screens has a maximum brightness of 350 nits.
If you are interested in more specs, feel free to check out this article for more details!
Follow along with the short videos below to increase the zoom on your screens!
*Please note that the videos only show one specific version of each OS. If the video does not line up with your version of Mac of Windows, you can always reach out to us for more specific set-up instructions.
PC:
Mac:
Many times this is simply the result of how your Tri-Screen is connected to your laptop. Please follow our interactive Getting Started Guide to identify the best connection for your laptop.
If you still have any troubles, please schedule a call with us here!
If you are having audio issues or no longer hearing any sound from your laptop speakers after installing the Xebec Tri-Screen, have no fear - this is a super simple adjustment!
Follow along with the short videos below to adjust your audio output in your laptop's audio settings.
*Please note that the videos only show one specific version of each OS. If the video does not line up with your version of Mac of Windows, you can always reach out to us for more specific set-up instructions.
PC:
Mac:
If you notice that the Tri-Screen monitors appear faded or washed out, this may be the result of your laptop automatically turning on an HDR (High Dynamic Range) setting after plugging in the Tri-Screen. This will cause the color washout because the Tri-Screen monitors are not HDR compatible.
To check if HDR has been turned on and disable the setting, please following the instructions below:
Mac:
- Move your cursor to the Apple icon at the top left of your main screen
- Select ‘System Preferences’
- Select ‘Displays’ - this screen may look different depending on which Operating System version you’re using
- Select the additional monitor representing the screen with the washed out color
- If the checkbox next to the HDR setting is selected, please uncheck the box, and select ‘Done’. Repeat these steps for the second monitor if both have HDR activated

If you are still experiencing the same issue, please schedule a call here. Our support team is standing by and happy to help!
Windows:
- Select Start > Settings > System > Display - your screen may look different than the images in the following steps depending on which Operating System you’re using
- Select the box representing the screen with the washed out color. This box should have a ‘2’ or ‘3’ inside of it

3. Scroll down to the “Brightness & Color” section and click the ‘HDR’ button

4. Turn off “HDR” if it is currently turned on. Repeat these steps for the second monitor if both have HDR activated
If you are still experiencing the same issue, please schedule a call here. Our support team is standing by and happy to help!
Many Xebec customers need to use a VPN service like Remote Desktop to access a network computer.
Using your Tri-Screen with one of these services is just as easy as using standard monitors. See below for links on how to connect some popular VPN services to multiple monitors.
If you use a different Remote Desktop service, pleasecontact usand we will look into it for you!
The Tri-Screen 2 comes with a 30 day return policy and a 1 year warranty.
For more details about the return policy, click here.
For more information about the warranty, click here.
Yes, we're happy to connect with you on a call! Click here to schedule a troubleshooting call with a Tech Support Specialist.
Need help with something else? Contact us via email here.
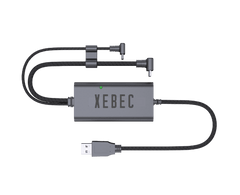
The Tri-Screen Adapter
The Tri-Screen Adapter is not needed for all set-ups, but depending on your laptop it may be necessary. Bheck whether your laptop needs a Tri-Screen Adapter with our quiz here!
You can find the DisplayLink divers for the Tri-Screen Adapter on our Drivers Page.
For detailed setup instructions, check out How Do I Use the Tri-Screen Adapter?
The Mouse
Click here to view the User Manual.

1. Click on the Apple Icon in the top left corner of your screen and select System Preferences.

2. Search for and select the Bluetooth option.

3. On the bottom of The Mouse, ensure that the power switch is turned ON. Then, press and hold the Bluetooth button for 3 seconds - you should see the light on top of The Mouse flash.

4. You should now see "Xebec Mouse" listed under Devices.

5. Click Connect. The light on top of The Mouse should turn solid white once connected and then turn off.
You are now ready to use The Mouse!
1. Click on your Start Menu (Windows Icon), and select Settings, then select the option that says Bluetooth & devices. You can also search your settings for Bluetooth.

2. Ensure your Bluetooth is turned ON, then select Add device.

3. Select Bluetooth.

4. On the bottom of The Mouse, ensure the Xebec Mouse is switched ON and then press and hold the bluetooth button for 3 seconds - the light on top of The Mouse will flash while it is connecting.
5. On your laptop, select Xebec Mouse.

6. The Mouse should connect - once it is connected, the light on top will turn solid white for a few seconds before turning off.

You are now ready to use The Mouse!
Dimensions: 34.4 mm x 100.5mm x 65mm
Battery life: 500 mAh
4-Way Scrolling
- Compatibility: Mac, PC, Chromebook, Linux, iOs
The Mouse comes with a USB-A to USB-C charging cable.
Simply plug the USB-C end of the cable into the front of the mouse, and the other end into a wall charger, PowerBank or into your laptop.
When the light on The Mouse goes from blinking to solid, it is fully charged.
You may continue to use The Mouse while it is plugged into a charger or into your laptop.

Yes! The Xebec Mouse is compatible with both Android and iOS.*
*Note: This was tested with the most recent updates of Android and iOS, so results may vary if you are using an older version.
The Mouse is compatible with almost all surfaces, including, but not limited to: wood, painted surfaces, plastic & metal.
The only surface that The Mouse is not compatible with is glass or any similarly reflective surface.
Removing your Xebec Mouse from your PC or Mac is very simple. Follow the instructions below.
PC:
1. Click on your Start Menu and select Settings.
2. Select Bluetooth & devices or search for Bluetooth within your settings.
3. Click on the 3 dots to the right of Xebec Mouse and select Remove device.
 4. The Mouse should now be removed from your PC.
Mac:
1. Click on the Apple Icon in the top right corner of your screen, then select System Preferences.
2. Search for and select the Bluetooth option.

3. Click on the small “x” to the right of where it says Xebec Mouse.

4. When prompted, select Remove.

5. The Mouse should now be removed from your Mac.
Yes! You are able to change the sensitivity of The Mouse using the DPI (Dots Per Inch) Button on the top. This will adjust the sensitivity of the cursor when the mouse is moved.

Cycle through three different options: 600, 800 & 1200 DPI.
If The Mouse is not turning on or connecting, there are a few things you can check.
On The Mouse:
- On the bottom of The Mouse, ensure The Mouse's On/Off switch is in the "ON" position. This will be indicated by a the color green on the switch.
- Ensure The Mouse is charged. To see if The Mouse needs to be charged, plug it into your charger and if the light blinks on and off, it is in need of charge and currently charging. Feel free to continue to use The Mouse as it charges.
On Your Laptop:
- Ensure 'Airplane Mode' is turned OFF.
- Turn your laptop's Bluetooth setting off, wait a few seconds, and then turn it back on.
- Remove The Mouse and then add it again.
If you are still having trouble connecting, set up a virtual call with one of our Tech Support Specialists HERE.
The Mouse comes with a 30 day return policy and a 1 year warranty.
For more details about the return policy, click here.
For more information about the warranty, click here.
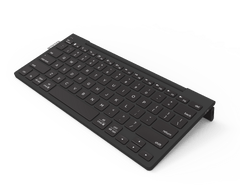
The Keyboard
Click here to view the User Manual.

Connecting The Keyboard to your Mac is very simple! Follow the instructions below and you will be set up in no time.
1. Click on the Apple Icon in the top left corner of your screen and select System Preferences.
2. Search for and select the Bluetooth option.
3. On the left side of The Keyboard, ensure that the power switch is turned ON.
4.On the top of The Keyboard, press and hold the Bluetooth button for 3 seconds - you should see the light on top of The Keyboard will turn blue.
5. You will now see "Xebec Keyboard" listed under Devices. Click Connect.
You are now ready to use The Keyboard!
Connecting The Keyboard to your PC is very simple! Follow the instructions below and you'll be up and running in no time at all.
1. Click on your Start Menu (Windows Icon), and select Settings, then select the option that says Bluetooth & devices. You can also search your settings for Bluetooth.
2. Ensure your Bluetooth is turned ON, then select Add device.
3. Select Bluetooth.
4. On the left side of The Keyboard, ensure The Keyboard is switched ON.

5. Press and hold the bluetooth button for 3 seconds - the light on top of The Keyboard will turn blue while it is connecting.

6. On your laptop, select Xebec Keyboard.

7. The Keyboard should connect.

You are now ready to use The Keyboard!
The Keyboard has a built-in, adjustable kickstand so you can work from wherever without sacrificing ergonomics or comfort. To adjust the kickstand, simply turn the hinge to your desired rotation!


Thinnest fully functioning keyboard (6.8mm)
Dimensions: 6.8mm x 290mm x 157.3mm
Battery life: 300 mAh
Adjustable kickstand
- Compatibility: Mac, PC, Chromebook, Linux, iOs
The Keyboard comes with a USB-A to USB-C charging cable that can be plugged into your laptop, a PowerBank or any compatible charging brick into a wall outlet.
The USB-C charging port for The Keyboard is located on the right-hand side:
 While charging, the colored indicator light on the top left of The Keyboard will indicate how full the charge is:
- Battery Low - Red
- Charging - Yellow
- Fully Charged - Green
In short, no. While The Keyboard can be paired with multiple devices, it will only function with the device it was last connect to.
In order to connect The Keyboard to another paired device, you may have to disconnect it from the device it is being used with before connecting it to the new device.
Yes! The Keyboard is compatible with both Android and iOS.*
*Note: This was tested with the most recent updates of Android and iOS, so results may vary if you are using an older version.
The Keyboard's function keys are defaulted to the "media" buttons and will need to be manually changed in order to act as F1-F12 keys.
This can be accomplished by pressing the Fn button on the bottom of the keyboard while pressing the function key you wish to use.
If you wish to lock the function keys so they default to the F1-F12, you can press Fn + Fn Lock to do so.

Removing The Keyboard from your PC or Mac is very simple. Follow the instructions below.
PC:
1. Click on your Start Menu and select Settings.
2. Select Bluetooth & devices or search your settings for Bluetooth.
3. Click on the 3 dots to the right of Xebec Keyboard and select Remove device.

4. Your Xebec Keyboard should now be removed from your PC.
Mac:
1. Click on the Apple Icon in the top right corner of your screen, then select System Preferences.
2. Search for and select the Bluetooth option.
3. Click on the small “x” to the right of the Xebec Keyboard.
4. When prompted, select Remove.
5. The Keyboard should now be removed from your Mac.
If The Keyboard won't turn on, or is otherwise unresponsive. There are a few things to check.
1. Ensure The Keyboard is turned on. The On/Off switch is located on the left side of the kickstand of the keyboard.
2. Check The Keyboard's battery life. It may be out of charge and need to be plugged in.
While charging, the colored indicator light on the top left of The Keyboard will indicate how full the charge is:
- Battery Low - Red
- Charging - Yellow
- Fully Charged - Green
If you are still having trouble connecting, set up a virtual call with one of our Tech Support Specialists HERE.
If your keyboard is failing to connect to your laptop, there are a few things you can check.
Check your Xebec Keyboard:
- Turn your keyboard off, wait a few seconds, and then turn it back on.
- Make sure that your keyboard is in range of your laptop.
Check your laptop:
- Ensure 'Airplane Mode' is turned OFF.
- Turn your laptop's Bluetooth setting off, wait a few seconds, and then turn it back on.
- Ensure that The Keyboard is not connected to / paired with another device. The Keyboard can only be paired to one device at a time, so if it is already paired with another device, it will need to be removed from that device before it will pair with your laptop.
- Remove the Keyboard and then add it again.
If you are still having trouble connecting, set up a virtual call with one of our Tech Support Specialists HERE.
The Keyboard comes with a 30 day return policy and a 1 year warranty.
For more details about the return policy, click here.
For more information about the warranty, click here.
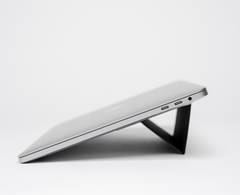
The AirStand
Installing The AirStand on your laptop is very simple!
1. Turn The AirStand over and remove the film to reveal the adhesive.

2. Turn your laptop upside-down and attach The AirStand to the bottom of your laptop closest to the hinge. You will want the have the Xebec logos facing towards you.


Material: Fiberglass board wrapped in vegan leather
Dimensions: 6.7” x 5” x 0.16”
Height Raised: 2”
Weight: 3.5oz
Tri-Screen Compatible: Yes
Laptop Compatibility: Fits All Laptops
The AirStand is not meant to be removed once it is installed onto your laptop. Removing it can create issues with the adhesive if and when you go to reapply it. For that reason, you should plan on keeping your AirStand on your laptop and simply folding it down when traveling.
Nope! The AirStand is designed with ventilation slits built in so that your laptop can continue to vent as you use it.

The Airstand comes with a 30 day return policy and a 1 year warranty.
For more details about the return policy, click here.
For more information about the warranty, click here.
The PowerBank
Click here to view the User Manual.

The PowerBank comes with a USB-C to USB-C charging cable.
This cable will connect to the USB-C port located on the bottom of The PowerBank in order to charge. You can plug the other end into any USB-C compatible laptop charger or power brick.
Note: You cannot charge The PowerBank from your laptop, as the PowerBank can only push power to the laptop itself.

The PowerBank can charge any device that uses USB-A or USB-C for charging.
The USB-A port (bigger one) is for charging small devices such as a phone, small tablet, keyboard, mouse, headphones, etc.
This port can also be used to trickle-charge your laptop.

The USB-C port (smaller one) has 3 uses:
1. Charging larger devices such as a laptop or large tablet.
2. Fast charging small devices such as a phone.
3. Recharging the PowerBank itself.
Yes! On the side of The PowerBank, simply press the round power button and it will indicate how much battery The PowerBank has.
There are four lights, each indicating the power in 25% intervals.

Battery: 20,000 mAh 3.7V (74Wh)
Input: USB-C - 5V - 3A | 9V - 3A | 12V - 3A | 15V - 3A | 20V - 3A |
Output: USB-C - 5V - 3A | 9V - 3A | 12V - 3A | 15V - 3A | 20V - 3A | USB-A - 4.5V - 5A | 5V - 4.5A | 5V - 3A | 9V - 2A | 12V - 1.5A |
Compatibility: Laptops*, Tablets, Phones, drones, anything powered via USB-C or USB-A *check your laptop’s manual for minimum power requirements
Dimensions: 26.5mm x 154 mm x 75mm
The PowerBank comes with a 30 day return policy and a 1 year warranty.
For more details about the return policy, click here.
For more information about the warranty, click here.
SoloScreen
Setting up the SoloScreen is very easy! We've created the SoloScreen Getting Started Guide for you here!
The SoloScreen can be used in both horizontal and vertical orientations (portrait mode), providing flexibility to accommodate various workflows. Changing the screen to match your orientation is easy!
For Mac:
NEW! We've created an app to help you arrange your SoloScreen in relation to your laptop, change your orientation, and even zoom in and out more easily! If you're interested in beta testing (currently for Mac only), visit our SnapDisplay App page for details!
1. On your Mac, choose Apple menu > System Settings, then click Displays in the sidebar. (You may need to scroll down.)
2. Click the pop-up menu next to Rotation on the right and choose how many degrees to rotate the image on your display.
3. In the dialog that appears, click Confirm.

For PC:
1. Select the Start button, then type settings.
2. Select Settings > System > Display, and choose a screen orientation from the drop-down list next to Display orientation.
3. Select the "2" screen.

4. Scroll down until you see the header, "Scale & layout".
5. Under "DIsplay Orientation" select the your desired orientation.

SnapDisplay App
The SnapDisplay App allows you to arrange your Xebec monitors directly from your laptop's menu bar instead of navigating through your display settings. In addition, you can select between landscape & portrait modes and zoom in & out with ease. It is designed to work with both the SoloScreen and Tri-Screen.
Currently, it's available for Mac users (don't worry if you're on a different operating system - we plan to bring the app to you soon!) and we're looking for Xebec customers to help us with beta testing.
If you're interested in using our app and providing feedback / identifying any bugs, check out our SnapDisplay App page to enter your email and receive the link for download.
First, sign up to be a beta tester (Mac only) on our SnapDisplay App page, and you'll receive a link to download via email.
Step 1: Click the link in email to initiate the download. From your downloads folder, click the SnapDisplay.dmg to open its folder, then drag and drop the icon into your Applications folder.

If you don't see Vinny the Vanagon on your menu bar at the top of your screen, double click within the Applications folder to open the app and he should appear.

Step 2: Click the Vinny the Vanagon icon on the menu bar and an app menu will appear. If you're using a Tri-Screen setup, select "Tri-Screen," and if you're using a Dual-Screen/SoloScreen setup, select the option that has left or right, depending on which side of the laptop your extra screen is located. You can also adjust for portrait or landscape mode here.

Step 2b - Tri-Screen Arrangements (only if using Tri-Screen setup): To see if your arrangement is set up correctly, scroll to the left of your laptop and see if your cursor appears on the screen to the left of your laptop. If it does, you're all set! If it shows up on the right screen, click the app icon again and select "Tri-Screen (Reversed)". This will swap the screens so they're recognized on the correct side in relation to your laptop!
At this time, the SnapDisplay app is only available for Mac devices, but we plan on developing a version for other operating systems soon!
If you run into any trouble opening the app once you receive the link via email, open your Mac system settings and under "Privacy and Security," select Security option "App Store and identified developers." (We're code signed and notarized through Apple!)
If you're still running into challenges, email us at contact@thexebec.com with "SnapDisplay App" in the subject and we'll help you out!
Shipping & Returns
Information about returns and our refund policy can be found here.
Check out our Shipping Policy page for all details on shipping!
Still Need Help?
Click here to schedule a troubleshooting call with a Tech Support Specialist. We aim to provide 1:1 support tailored to your unique setup, and scheduling allows us to ensure we'll have enough time to work through any challenges you're experiencing!
(Note, this isn't the best avenue for sales questions, refund inquiries, missing orders, or marketing questions. Please email us at contact@thexebec.com for those!)
Use this link to contact our team.